Have you ever struggled to identify the emulsion side of your film? It can be tricky, but it’s crucial to know which side is which when working with film. In this article, we’ll discuss why it’s important to identify the emulsion side and give you some tips on how to do it effectively.
What is the emulsion side of negative film
The emulsion side of negative film is the side where the light-sensitive layer is located. This layer interacts with light when the film is exposed, and it’s what creates the final image that you see. However, the exposed emulsion doesn’t become visible until it’s developed during the film processing stage.
Although photographic emulsion shares the name with a chemical emulsion, it’s not actually the same thing. A chemical emulsion refers to a mixture of two or more liquids that cannot usually be combined, photographic emulsion, on the other hand, is a mixture of solid particles (silver halide) in a fluid (gelatine). However, in photography, the term “emulsion” has become widely used and accepted.
How to identify the emulsion
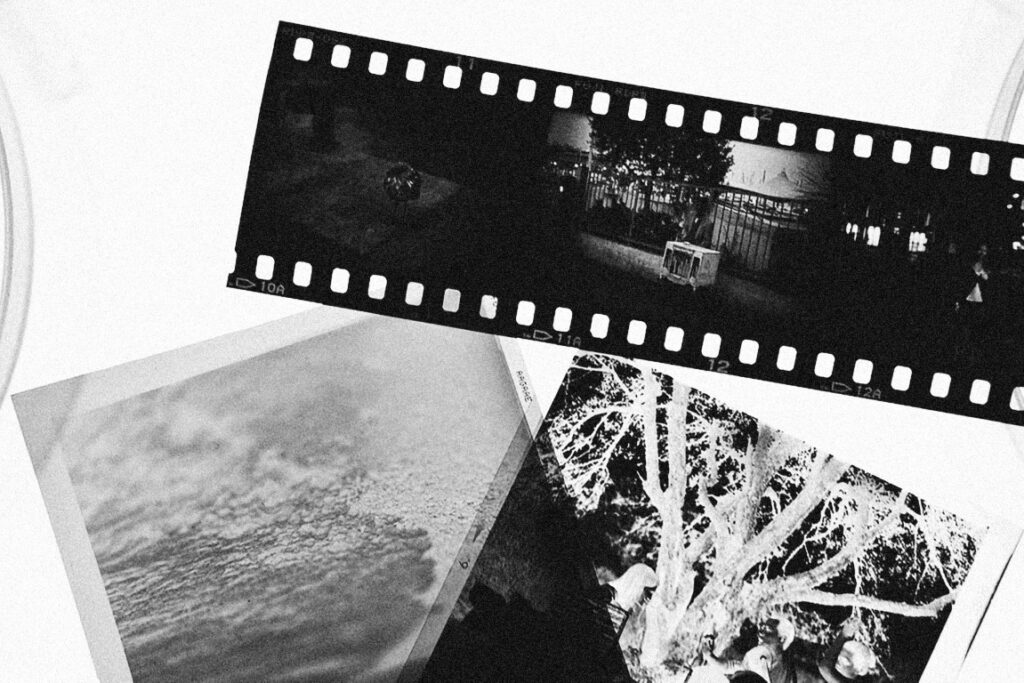
In general, both black and white and color films have an emulsion side that appears shinier and may have a slightly bluish or purplish tint. The base side, on the other hand, appears duller and matte, and is slightly rougher compared to the smooth emulsion side.
Identifying the emulsion side of black and white film is usually straightforward because it has a simple one-layer design, making it easier to see differences in texture and appearance. However, identifying the emulsion side of color film can sometimes be more challenging due to the added complexity of the color layers and other layers used for contrast, saturation, or to prevent curling. Some films even have additional layers on top that make it very difficult to distinguish between the emulsion and base sides.
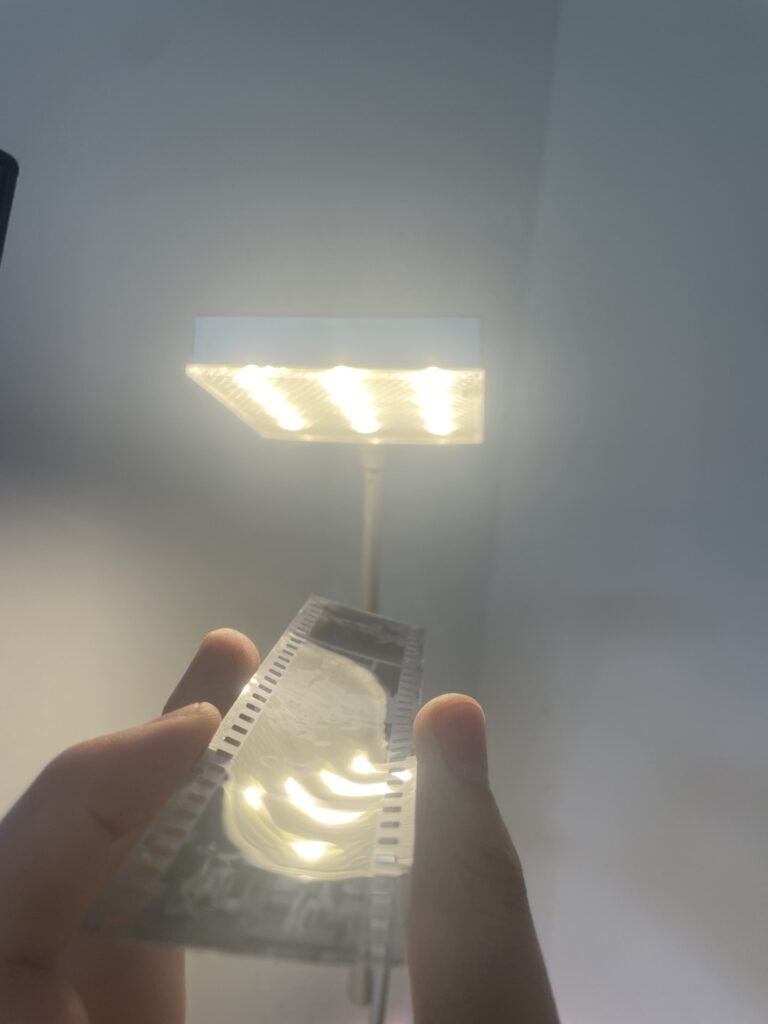
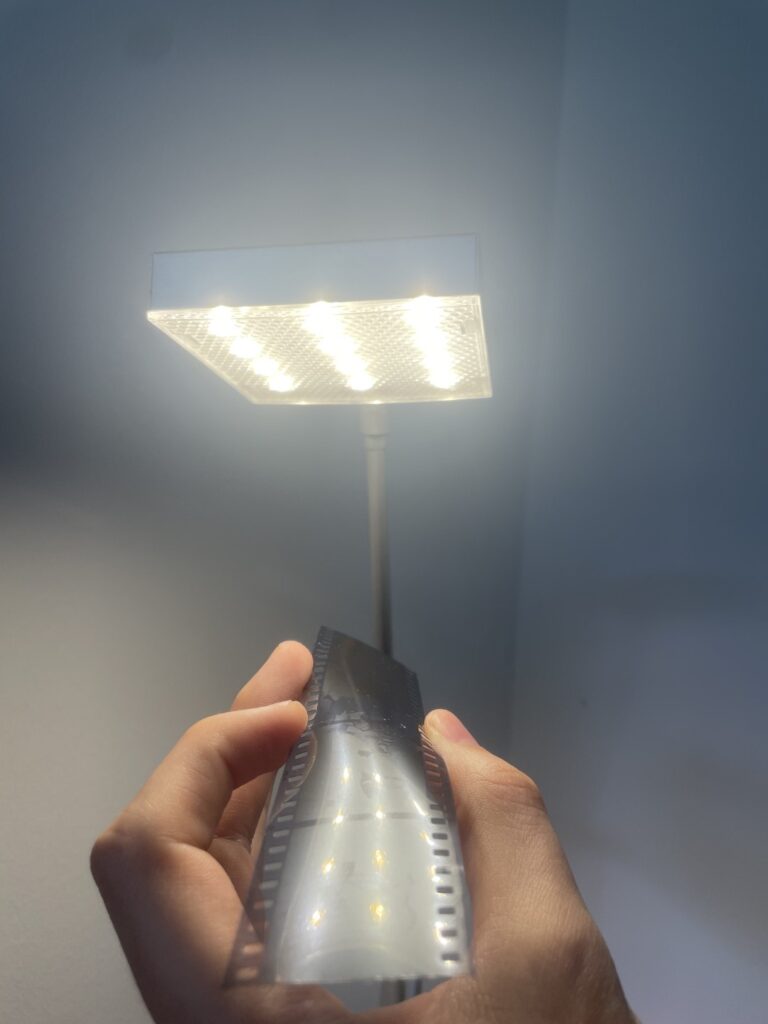
To make identifying the emulsion side easier, we recommend using a light source such as a window, smartphone flashlight, or desk lamp. Hold the negative up to the light source and flip it back and forth. You should notice that one side looks dull while the other side appears shinier. If this method doesn’t work for you, don’t worry. We have several other tips below.
Check the notches and edge markings of your film
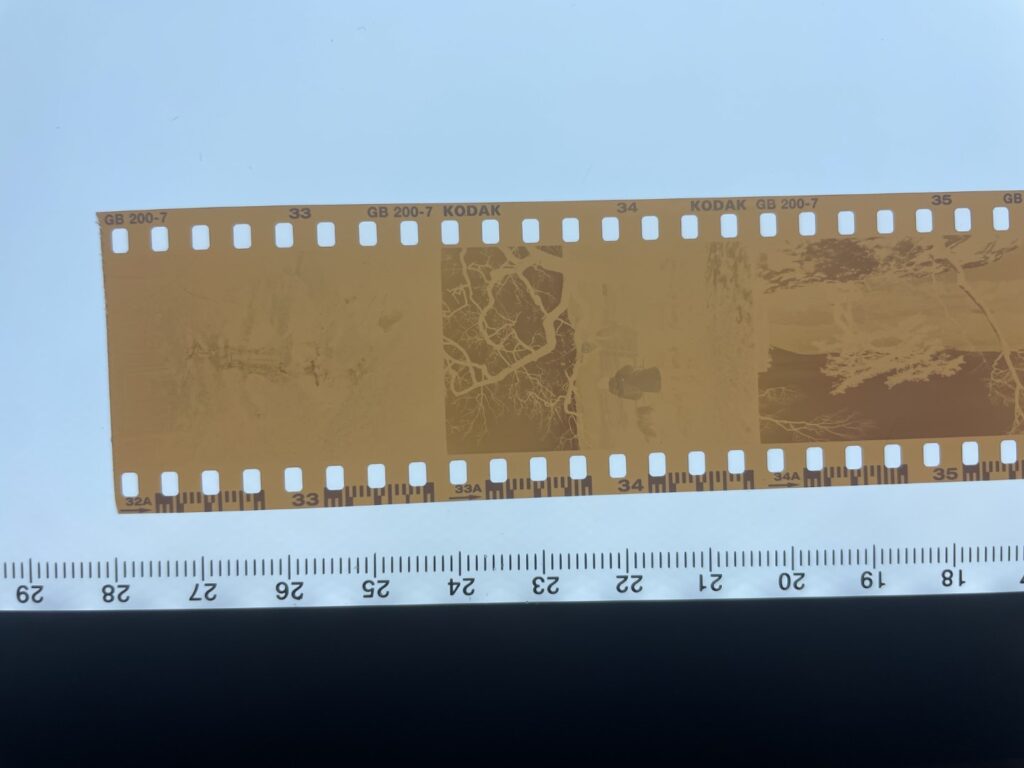
Currently, the majority of films being sold include edge markings which contain important data such as the film’s speed, frame type, and film type. These markings are usually found on the base side of the film and can help you identify the base and emulsion with ease. However, it’s important to note that not all film stocks have edge markings. If you find a film that doesn’t have these markings, such as Fomapan Bulk rolled film, you will need to consult one of the other methods that we have shown in this article.
Spot the concave or curved side
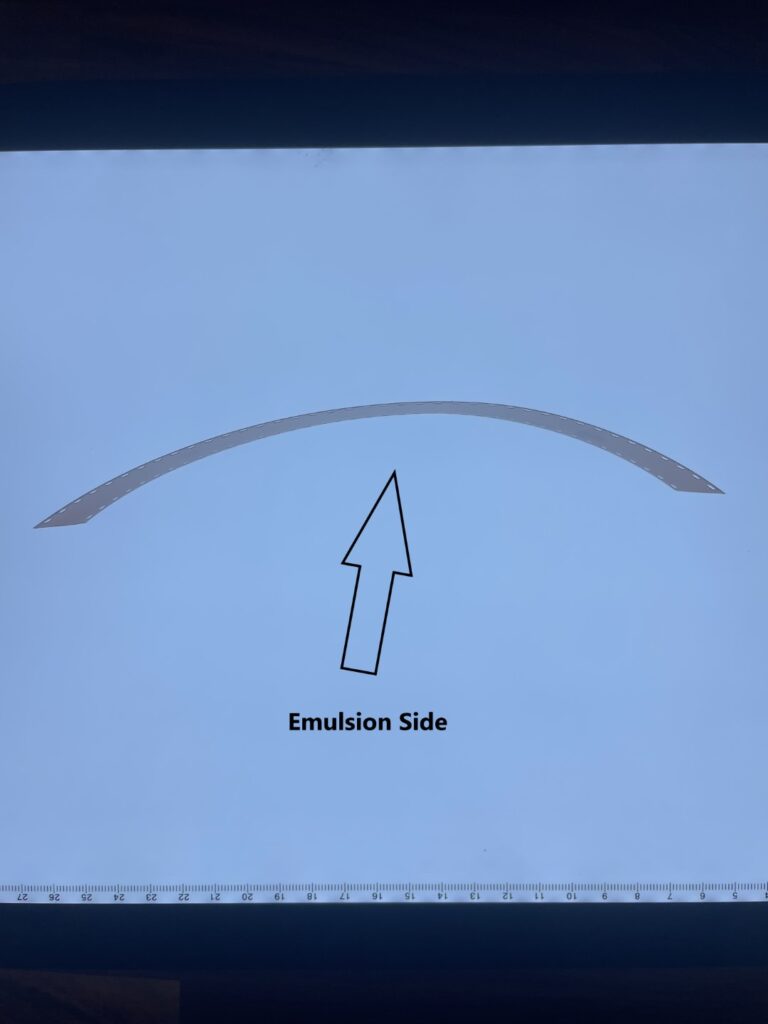
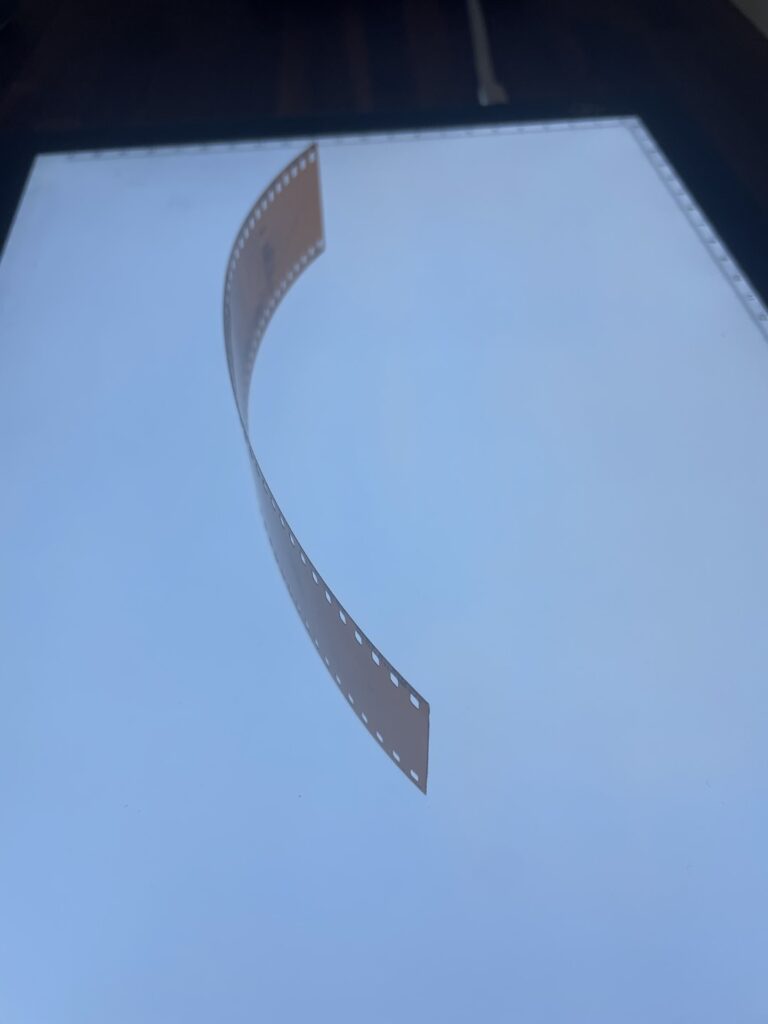
You can also spot the concave or curved side. Hold the developed negatives in your hand and check them from the side, the convex side that is curved upwards is always the emulsion side.
Scan to check
If these methods don’t work, you can always scan the negative on your scanner and check whether the image is mirrored. For this to work, you need to know which way you have to put your negative, verify by checking the manual and then give it a try. Scanners always want so scan the emulsion, which results in a mirrored image.
Why you should know how to identify the emulsion side of your negative film
Knowing how to identify the emulsion side of your negative film is essential if you want to achieve the best possible results in your film photography. The emulsion side of the film is the side where the light-sensitive layer is located, and this is what interacts with light when the film is exposed, creating the final image. By knowing which side is the emulsion side, you can load your film correctly and ensure you are using the correct side when printing or scanning your negatives. This can make a significant difference in the sharpness and clarity of your images. Additionally, handling the emulsion side with care can prevent damage or scratches, which can ruin your negatives and result in lost images.
What are the differences between black and white and color film emulsions?
Black and white films and color-negative films look different from each other in terms of contrast, detail, and colors. Because of these differences, it’s natural that they also have different emulsions.
The different light-sensitive layers
One of the main differences between black and white film and color film is the number of light-sensitive layers they have. Black and white film usually has one layer that is sensitive to light, while color film has several layers, each sensitive to a different range of colors (red, green, and blue). Each layer contains a different color dye that is activated when light hits the emulsion. During film processing, the dyes are chemically developed to create a full-color image. Due to the easier composition of black and white film it is also a genereally more affordable film type compared to color or slide film.
The chemical composition of the emulsion
The substance of Black and white films is called silver halide emulsion and is coated onto a clear material. When the film is processed, the parts that were exposed to light turn into metallic silver based on how much light they received. This creates a negative image of the scene in black and white.
Color negative film is different from black and white film because it has multiple layers of emulsion that are sensitive to different colors. These layers are also coated onto a clear material, along with extra layers that help control the colors and contrast. When the film is developed, the exposed silver halide turns into color dyes, based on the color couplers in the emulsion layers. This creates a negative image that shows the colors and tones from the original scene.
Processing the emulsion
Developing black and white and color film requires different chemicals, processes, and careful attention to detail.
Developing black and white film involves using a developer, stop bath, and fixer to create the image. The developer turns exposed silver halide particles into metallic silver, while the stop bath halts the process and the fixer removes unexposed silver. The film is then washed and dried.
Color film development, on the other hand, is more complicated. The developer starts a chemical reaction in each layer, creating silver and dye couplers. The couplers then react with other chemicals to produce color dyes. After development, the film goes through bleaching, fixing, washing, and stabilizing to remove excess silver and fix the color dyes. The temperature and timing of each step must be precise to ensure accurate and consistent results, as any deviation can cause color shifts or contamination.