Why Film Needs to be Washed
In the captivating world of film photography, washing film plays a critical role that goes beyond simply removing chemicals. It’s an essential step that ensures the longevity and quality of your photographic treasures.
The Role of Washing in Film Development
Washing is a vital step in film development. You might think of it as the film’s spa session, where it gets a thorough cleanse after a chemical treatment. So, what exactly does washing do?
During development, your film swims in a bath of developer and fixer. These chemicals activate the photosensitive silver halides in the film, transforming them into the silver particles that create our cherished images. However, these chemicals aren’t something we want lingering around. If left unchecked, they can damage the film over time, leading to fading or staining of your precious negatives.
That’s where washing comes into play. Like a powerful tide, it sweeps away these residual chemicals, keeping your negatives safe from harm. But washing is more than just a safeguard—it also prepares the film for the final stages of development and ensures that the developed images remain stable and durable over time.
Consequences of Not Washing Film
Now, you may wonder, “What happens if I don’t wash my film?” Well, that’s a risky path to tread. Neglecting to wash your film can lead to several unwanted consequences. First, the residual chemicals will continue to react with the film. Over time, these reactions can lead to discoloration and fading of the image. In worst-case scenarios, they can even degrade the film base, leading to a total loss of your negatives.
Second, unwashed film is likely to have poor archival quality. That means your negatives won’t stand the test of time, and the images they carry can be lost forever. So, in a nutshell, washing is not just a step in the film development process—it’s a shield that protects your negatives from damage, ensuring the longevity and quality of your images.
The Process of Washing Film
We’ve covered why washing film is crucial, but how exactly do we go about it? Understanding the steps and components of the process can help you gain control over the final outcome of your film.
The Importance of Pre-wash in Film Development
Let’s start with pre-washing. It’s like the warm-up exercise before the main workout, preparing your film for the development process. Some photographers skip this step, but many swear by its benefits.
Pre-washing involves a simple rinse with water before development. This preliminary rinse helps to remove the anti-halation backing on the film, preparing it for the developer. It also helps to achieve a uniform temperature across the film, ensuring consistent development. But do you have to pre-wash? While not mandatory, a pre-wash can often make the subsequent development process smoother and more predictable.
The Significance of Hypo Clear in Film Washing
After the film has been developed and fixed, it’s time to introduce it to hypo clear. But why? And what exactly is hypo clear?
Hypo clear, or a hypo clearing agent, is a solution used to remove the fixer (also known as “hypo”) from the film more efficiently than water alone. This is an important step because the fixer, if not removed completely, can harm your negatives over time. So, using hypo clear isn’t just a cleaning process—it’s a step towards preserving your film for the long haul.
But is it necessary? While not strictly required, using hypo clear can save you a lot of washing time and water, making it an environmentally friendly choice. Plus, it helps ensure your negatives are free from any lingering fixer, safeguarding their longevity.
Understanding Photo Flo and Its Role in Film Washing
Meet Photo Flo—a photographer’s handy helper during the washing process. But what is Photo Flo, and what magic does it weave?
Photo Flo is a wetting agent that reduces water’s surface tension. When used in the final rinse, it allows the water to spread evenly over the film, preventing the formation of water spots during drying. These spots can mar the appearance of your negatives and make scanning or printing a challenge.
Duration of the Final Wash in Film Developing
So, you’ve done the pre-wash, introduced your film to hypo clear, and got Photo Flo into the mix. What’s left? The final wash.
This stage involves a thorough rinse with water to ensure all chemicals are washed away from the film. How long should this final rinse be? While the exact time can vary and it also depends on the method used, but a good rule of thumb is to wash your film for about 10 to 20 minutes with constant agitation. A properly washed film is key to achieving high-quality, lasting negatives. If you are interested in our favorite film washing technique, check out our guide to the Ilford Method.
In a nutshell, washing isn’t a one-step process—it’s a carefully orchestrated series of rinses and treatments, each with a distinct role in creating and preserving your photographic masterpieces.
Film Washing Best Practices
Armed with an understanding of the washing process, let’s delve into the best practices that can help you get the most out of your film washing. Whether you’re a beginner or an advanced film photographer, these tips can enhance the quality of your negatives and extend their lifetime.
Appropriate Water Types for Film Washing

First things first: the water. Tap water or distilled water – which one is the right choice for washing film? Here’s the deal: you can use either, but each has its pros and cons.
Tap water is readily available and cost-effective, but its quality can vary significantly. The mineral content in tap water, in particular, can leave residue on your film, causing spots and affecting the clarity of your negatives. Therefore, it’s essential to be aware of the mineral content of your local tap water. If you notice mineral deposits or spots on your negatives after using tap water, it might be a sign that your tap water contains a high level of minerals.
Distilled water, on the other hand, is pure and free of minerals and other impurities. It’s a safer choice for washing film, especially if you’re concerned about water spots or residue. However, it might not be as easily accessible or cost-effective as tap water. The bottom line? If your tap water is relatively pure and leaves no residue on your film, feel free to use it for washing. But if you notice mineral deposits or spots on your negatives, consider switching to distilled water for the final rinse. This practice can help you avoid water spots and ensure clean, clear negatives.
By paying attention to your water quality and adjusting accordingly, you can optimize the washing process and enhance the longevity and clarity of your negatives.
Avoiding Water Spots and Residue During Washing
Speaking of water spots, what are other ways to avoid these pesky intruders? Enter Photo Flo, a wetting agent. As mentioned earlier, a wetting agent like Photo Flo reduces the surface tension of water, preventing water spots during drying. Using it in your final rinse is an effective way to banish water spots from your negatives. Photo Flo is probably the best known wetting agent but there are other ones around, too. Check out similar products from Arista or Ilford as well, there actually is not really a lot of difference between these products.
But what about residue? Residue can come from impure water or incomplete washing. To avoid this, ensure that you’re using clean water for washing and that you wash your film thoroughly.
The Purpose of Hypo Clearing Agent
We’ve already met hypo clear in our washing process. As a friendly reminder, this agent is all about speeding up the washing process and ensuring the complete removal of the fixer from the film.
While hypo clear is not strictly necessary, it’s a valuable ally for thorough washing and conservation of water. If you decide to use hypo clear, follow the manufacturer’s instructions for the best results. Our recommended Hypo clearing agent is Kodak Hypo Clear.
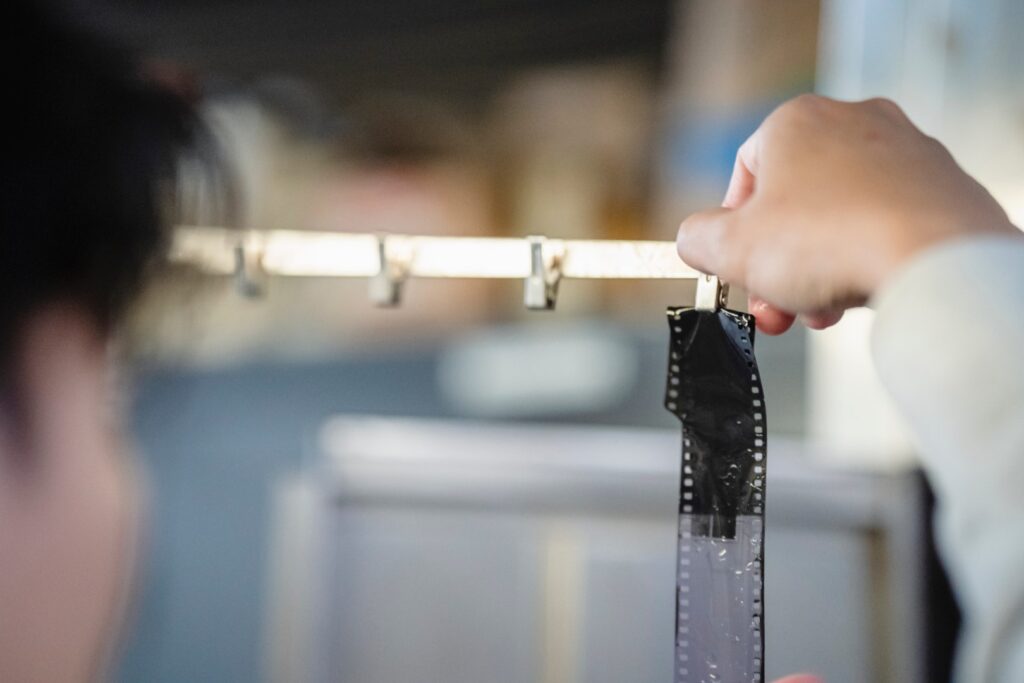
Importance of the Final Rinse in Film Washing
The final rinse is the last opportunity to remove any remaining chemicals from your film. It’s a vital step that ensures your film is clean and ready for drying.
As a general rule, a 10 to 20-minute final rinse with constant agitation is recommended. You can adjust the duration based on your water quality and the type of film you’re using. And don’t forget to add a drop or two of Photo Flo to prevent water spots!
Key Factors in Effective Film Washing
Now that we’ve explored the best practices, let’s delve into the specifics that can make or break your film washing process. These factors range from the water temperature to the usage of specific washing tools and techniques, and understanding them can significantly improve your film washing results.
Correct Temperature for Film Washing
Like a relaxing bath, the water temperature for film washing is crucial. Too hot, and it may harm your negatives; too cold, and it might not effectively remove the chemicals. So, what’s the sweet spot?
Let’s break it down according to the type of film you’re working with:
Black and White Film: For black and white film, you want to aim for a lukewarm temperature, generally around 20°C (68°F). This temperature is mild enough to avoid damaging the film emulsion, yet warm enough to facilitate the effective removal of residual chemicals. Maintaining this consistent temperature throughout the washing process is vital to ensure that your film develops evenly and to minimize the risk of thermal shock, which can lead to reticulation or other damages to the film.
Color Film: Washing color film requires a slightly different approach. The ideal temperature for washing color film is typically higher, around 38°C (100°F). This higher temperature aids in the effective removal of chemicals without damaging the color dyes in the emulsion.
Color film is also more sensitive to temperature variations than black and white film. Inconsistent temperatures can lead to color shifts or uneven development, so it’s crucial to maintain a steady temperature throughout the washing process.
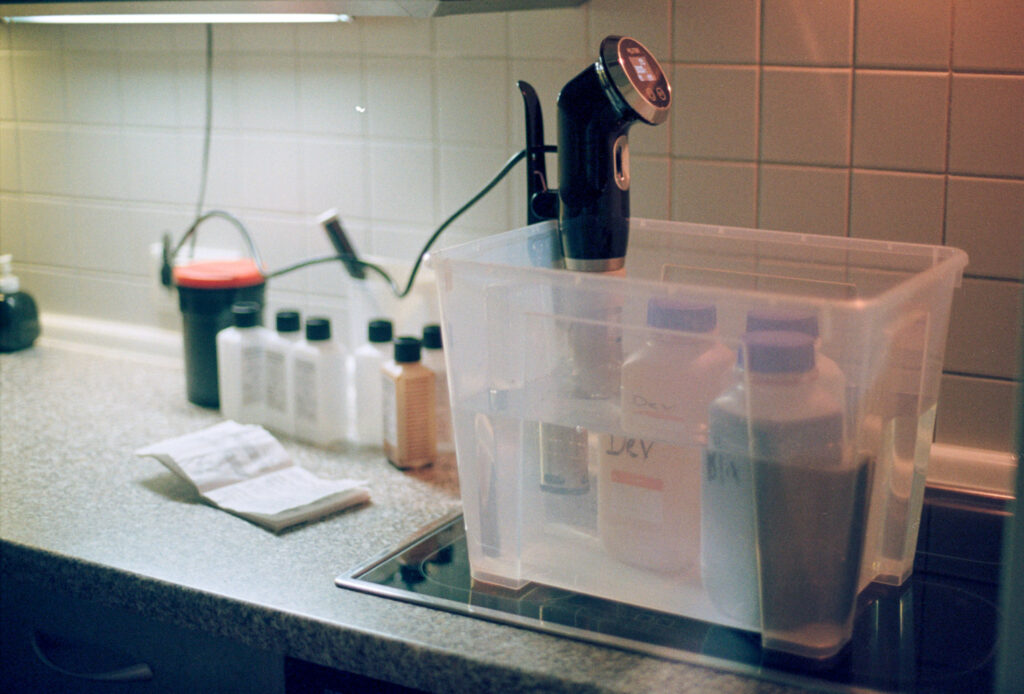
By tailoring your washing temperature to the type of film you’re working with and maintaining consistency throughout the process, you can optimize the chemical removal, safeguard the film quality, and ultimately enhance the longevity and clarity of your negatives. To check your temperature, I suggest using an inexpensive thermometer, such as those commonly used for cooking purposes. Remember to keep separate thermometers for chemical and food-related applications.
Usage of Film Washer
If you’re washing film regularly or handling large volumes, a film washer can be a worthy investment. This device simplifies the washing process and can increase its efficiency.
A film washer is a tool that connects directly to a water source and provides a continuous flow of water around your film. It helps ensure all areas of the film are constantly exposed to fresh water, improving the removal of residual chemicals.
This device can make the washing process more convenient, especially when handling multiple films. However, remember that a film washer isn’t strictly necessary. With careful attention to the process and conditions, you can achieve effective film washing even without a film washer. The important part is to ensure your film gets a thorough wash with fresh, clean water, and all residual chemicals are effectively removed.
Whether you choose to use a film washer, stick with the traditional sink and running water or choose to use the Ilford Method, following the best practices and key considerations discussed here can help you achieve a successful film washing process.
Special Techniques for Washing Color Film and Black and White Film
Are there differences when washing color film versus black and white film? In general, the process and principles remain the same—remove the chemicals, avoid water spots, and ensure clean, lasting negatives. However, color film is generally more sensitive to temperature variations. When washing color film, ensure to maintain a consistent temperature throughout the process. On the other hand, black and white film is more forgiving when it comes to temperature.
How to Know When Your Film is Adequately Washed
Knowing when your film is adequately washed is crucial for the longevity and quality of your negatives. Over-washing can lead to unnecessary water waste, while under-washing can leave residual chemicals on your film, shortening its lifespan and affecting image quality. So, how can we strike the right balance?
Here’s your guide to recognizing when your film is clean and ready for drying:
The Duration of the Washing Process
The duration of the washing process is a good initial indicator of whether your film is adequately washed. As a general rule, washing should last around 10 to 20 minutes with continuous agitation or follow a specific washing pattern. This timeframe provides ample opportunity for the water to penetrate the film’s emulsion and dissolve the residual chemicals. If you adhere to this timeframe and follow the washing best practices, your film should be adequately cleaned.
However, note that the washing duration can be influenced by factors such as the type of film, the fixer used, and the water quality. As you gain more experience with washing, you may need to adjust the washing duration according to your specific circumstances.
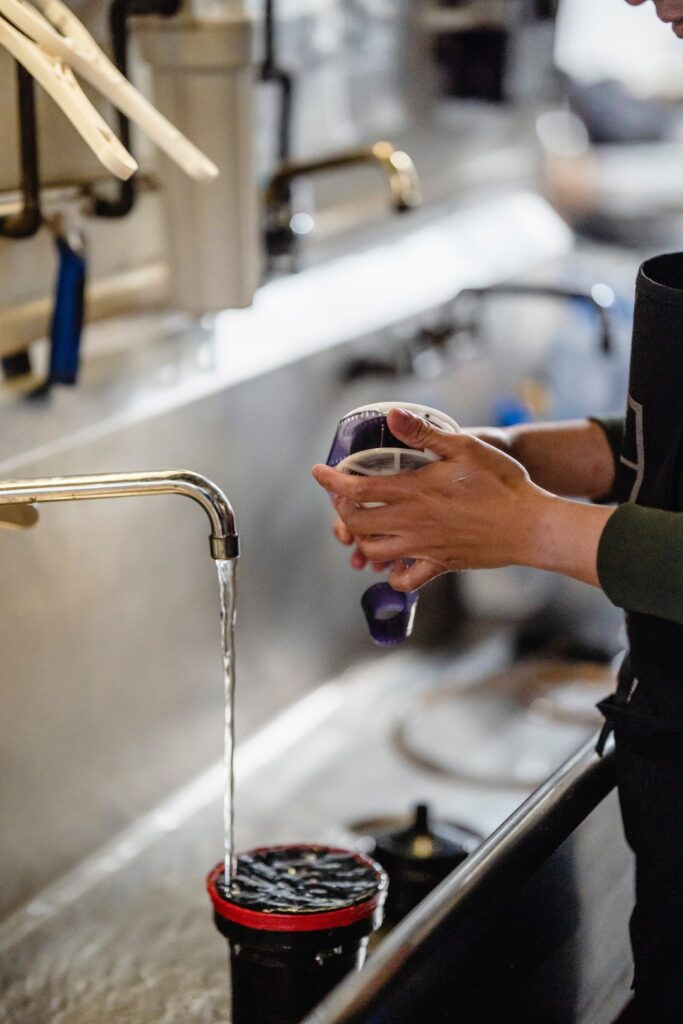
Observing the Washing Water
A good way to check if your film is adequately washed is to observe the washing water. If the water runs clear without any coloration or cloudiness, it’s a good sign that the chemicals have been washed off the film. By observing the washing duration and paying attention to the clarity of the washing water, you can ensure that your film is adequately washed.
Exploring the Ilford Method for Film Washing
While traditional water washing is a tried and true method, there are alternative techniques that can be just as effective and provide added benefits. One such alternative is the Ilford Method, an efficient water-saving approach that doesn’t compromise on the washing quality.
Named after the renowned film and paper manufacturer, Ilford, this technique is particularly well-suited for those seeking to save water or reduce their environmental impact without sacrificing their film’s longevity. Here’s how the Ilford Method works: Instead of a continuous flow of water for a set amount of time, the method involves filling and emptying your developing tank with water a set number of times, with inversions for agitation in between. The Ilford Method offers significant water conservation benefits, making it a great choice for environmentally conscious photographers. It’s also a more accessible option if you’re working in a space with limited water supply. Make sure to check our complete guide.